Dried Dill
A practical guide to drying dill with a focus on preparing the herbs, controlling moisture, and storing the finished product conveniently.
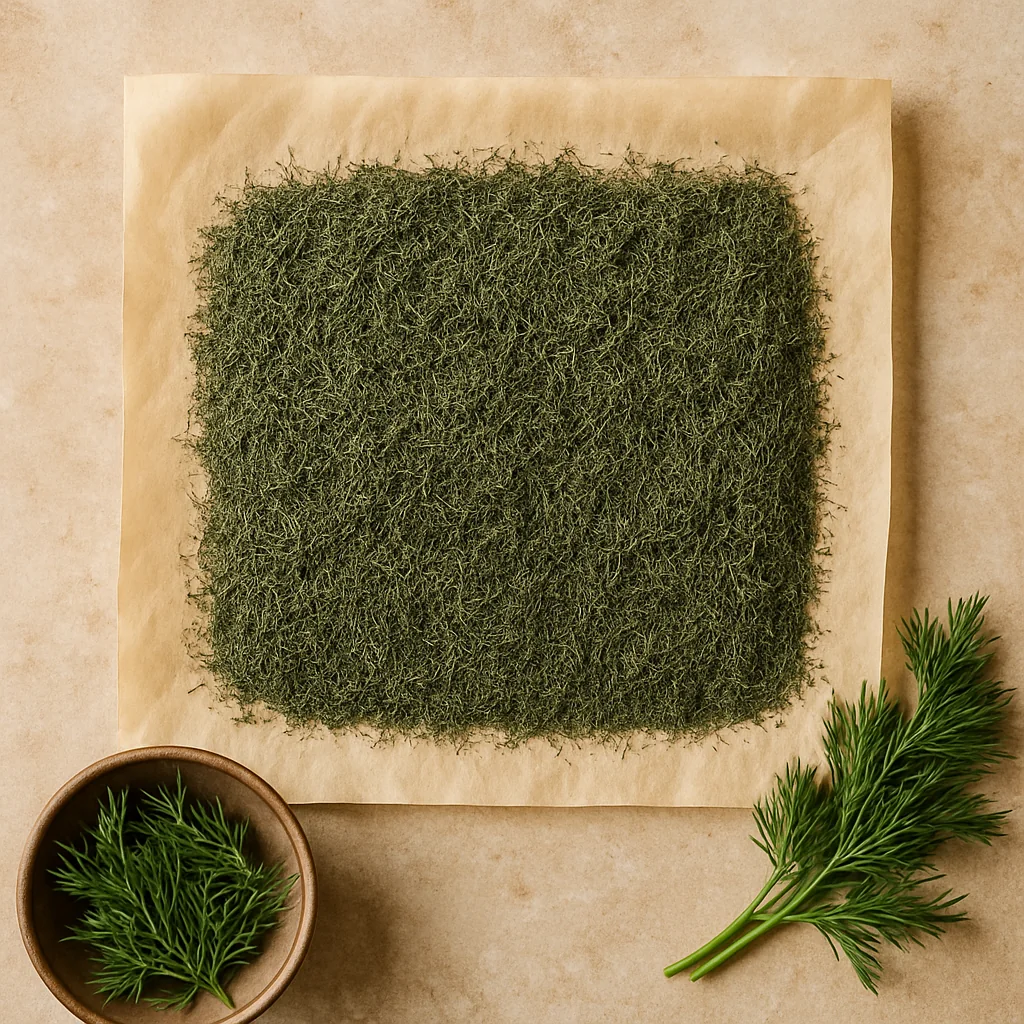
Dried dill is a practical homemade staple that is easy to store and use in everyday cooking.
What you will need
Below is the ingredient list for this recipe with the base proportions. It is convenient to prepare everything you need in advance so the cooking process goes more smoothly and without rushing.
There is 1 item in the list. It is convenient to check that everything is ready first and only then move on to the cooking steps.
- Fresh dill500 g
How to make it
The recipe is broken down into clear steps so it is easy to follow right in the kitchen. Move through them in order to keep the process under control and avoid missing important details.
This recipe has 4 steps. It is easiest to follow them in order without jumping between stages.
Step 1
Prepare the dill. Sort through it, rinse it quickly, and dry it thoroughly.
Step 2
Spread it out in a thin layer on mesh trays or dehydrator trays.
Step 3
Dry at 35–40°C until fully dry and brittle.
Step 4
Cool completely and store in a dry jar.
What else to try in this subcategory
After one successful recipe, it is often useful to open a few similar ones and get a better feel for how this drying category works.
Dried Herb Blend
A dried herb blend is a practical homemade recipe with a focus on flavor, texture, and convenient storage.
Dried Mint
Dried mint is a practical homemade staple that is easy to use in tea and fragrant herb blends.
Dried Parsley
Dried parsley is a practical homemade staple made from parsley, with a focus on flavor, texture, and easy storage.
Dried Basil
Dried basil for tomato-based and Mediterranean dishes.
What else works well next to this recipe
A dehydration recipe works best alongside the broader dehydration section, drying problems, guides on storage, and the nearby topic pages connected to the same pantry direction.
Return to the main drying section with all major directions: fruit leather, dried fruit, vegetables, mushrooms, herbs, and greens.
Useful when the result turns sticky, under-dried, over-dried, or unstable in storage.
Explanations about doneness, temperature, storage, and getting more stable results.
Broader topics that connect naturally to this recipe
A dehydration recipe is often only one part of a broader subject: fruit leather, herb drying, homemade teas, or seasonal harvest processing. These pages help you move further without random searching.
Homemade Herbal Teas
Herbal teas, drying, dandelions, pine cones, and other aromatic home scenarios where dehydration naturally leads into a broader topic.
Herbs for Drying
Mint, lemon balm, thyme, basil, and other herbs for people who want a broader view of drying and later pantry use.
What deserves attention
In dehydration, layer thickness, full drying, proper cooling before storage, and stable dry storage all matter. If the result seems doubtful, it is worth checking the drying problem pages before keeping it long term.